Banish the boredom of long winter nights by taking a torch and creating some art. Light painting is a wonderful ay to explore the intricacies of night time long exposures, and a really good way to have fun with other people too!
What is light painting?
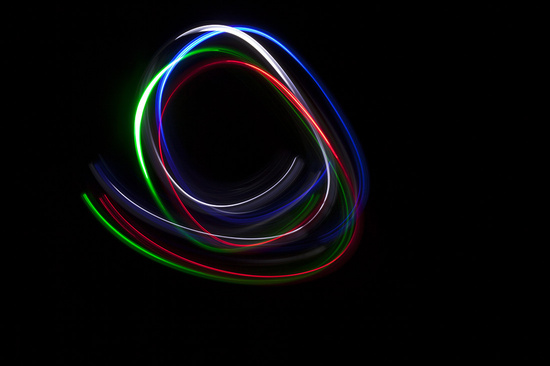
It is exactly what it says… creating a painting with a source of light– the film (or sensor) is your canvas, and the light is your paint.

What do I need?
A source of light - this can be in the form of:
- Flashlight
- Glo-stick
- Sparkler
- Flashing ball
- Literally anything that glows in the dark or gives off light!
Multi coloured flashy ‘things’, the sort you get at festivals and in Christmas stockings are great. Some people go as far as to use actual flames on home-made torches – but unless you are a pyrotechnician, we wouldn’t recommend it!
You’ll also need a tripod – long exposures require a steady hand, plus if you are the one creating the light art, you can’t be holding a camera at the same time!

How do I make a light painting?
Move and experiment! There are some great examples of incredibly calculated geometric shapes that appear to defy the laws of physics – but even something simple like making a heart shape in the air, or a halo around someone’s head can create a striking image.
Try circles and spirals, run down a path, trace an outline of a person, write your name or draw a smiley face.
Put a glow stick on the end of some string and swing it about. Stay still, jump, turn and run.
Get a friend to stand, sit or lie still while you create scenery painted light around them, or create your own mid-air graffiti in the setting of your choice.
This is an expressive way to capture an image – your imagination is your only limitation, and remember, the more you move around, the more you ‘paint’.
TipIf you don’t want to be in the picture, make sure you wear dark clothes so you are less conspicuous!

Setting up your camera
Low ISO - less light comes in so the surroundings won’t be lit up too much
Long shutter speed - start with 5 seconds and work your way up to the point where you need to use bulb mode
High F Number - keeps everything in focus when you are running around, plus less chance of over exposing your surroundings
Remember - The longer your shutter is open, the more time you have to move around and paint your picture.

Inspiration
Just take a look at all the fantastic light paintings out there already – there are a multitude of ideas that you can emulate, make your own and refine. Use the light painting tag right here on 365 Project to see some amazing photos from our community, and even ask for advice if you need it.
The key to this is to play and have fun. Taking other people along with you and asking them to join in can take it to a whole new dimension – especially if you know someone who likes to play with fire poi!
Got some light painting tips and shots to share? Let us know your top tricks in the comments below!
**Photos updated on December 29 2018**
 my first attempt.